Introduction
- When creating an API to be consumed by client we need to restrict the access for security reasons.
- This policy allows only authorized applications to access the deployed API implementation. Each authorized application is configured with credentials: client_id and client_secret.
- The enforcement checks the request for a client ID and optional secret that matches the providers. As this data is in API Manager, each Mule Runtime keeps a cache, which updates periodically. This cache is persistent, and is useful for performance, and in the event of a sudden loss of connectivity to the platform.
- Mulesoft API Manager provides several client ID-based policies to check if the requests are made by valid client application.
- Client-ID Enforcement
- Rate Limiting – SLA-Based
- Throttling – SLA -Based
- Basic Auth
- The client application must be registered on the AnyPoint platform to generate client credentials (client_id and client_secret). After client application registration, all subsequent requests must pass client_id and client_secret, as part of the request while invoking an API.
In this walk-through Client-ID Enforcement will be addressed.
Steps to introduce Client Id Enforcement Policy
- Client ID based policies by default expect to obtain the client ID and secret as headers. To enforce this in the API definition a trait can be defined in RAML. Design API RAML Specification with traits client_id and client_secret headers.
- Publish the API to API Exchange.
- Go to API Manager and manage the created API from exchange. The status of the API should be Unregistered. Make note of API Instance ID.
- Go to Policies and apply “Client ID Enforcement” policy
- You will notice a Custom expression having client_id and client_secret has already been generated. Please Note: you may also create set of credentials as part below:
- Client ID and (optional) secret as headers.
- Client ID and (optional) secret as query parameters.
- Client ID and secret as a basic access authentication header.
- Client ID and (optional) secret retrieved from the message payload
- Register API with Client Application: Users need to send a token in addition to an ID with every request to an API that enforces client ID-Based policies. To obtain the ID and token, client app developers request API access using the Request API Access control on the portal for the API.
- Go to Exchange and click Request Access
- Select your API Instance value from drop down and create a new application corresponding to it. Try to give name of the application same as your client application name which will try to access this API.
- Your client_id and client_secret credentials are ready which will be used to trigger your client application. Save the credentials
- Go to API Manager, and in Client Applications, you should be able to see your application created. You should be able to get above created client_id and client_secret by clicking on this client application as well.
- The request for API access can be automatically approved or, in the case of a client ID-, SLA-based policy, require approval by an admin of the API. Also, you should be able to receive email for successful creation and approval of API and client application.
- Go to Anypoint studio, import your RAML using either of the below ways:
- Create new project and connect to your account’s design Center and import RAML from Design Center through “Import a published API”.
- Import RAML from local file – (Download RAML from Exchange to your local system)
- Download RAML from Design Center by connecting to your account.
- For already existing application, just right click and download RAML from Design Center:
- The default router configuration looks something like this, no changes required here:
- Get anypoint platform environment credentials by clicking on [i] as shown below in API Manager and capture environment credentials.
- Pass the values in runtime properties/ arguments -> To deploy the application successfully to cloudhub:
anypoint.platform.client_id=*********************************
anypoint.platform.client_secret=******************************
To deploy the application successfully to Anypoint studio:
-M-Danypoint.platform.client_id=*****************************
-M-Danypoint.platform.client_secret=**************************
- Also, you can configure Anypoint Platform credentials into Anypoint studio and click on validate. It should show you a green check mark.
- The API should be imported successfully to the Anypoint Studio. Go to the listener xml and do the necessary implementation.
- Try to hit the application and you should be able to receive a successful response from the client application by passing any values in client_id and client_secret headers.
- To make Client ID Enforcement Policy work we need to create API Auto Discovery in the Global Elements. With API Id same as Instance ID for the API. Apply the policy to corresponding flow which you want to secure:
- Since Client ID Enforcement policy is applied successfully, you should receive below response:
- Now, correctly pass client_id and client_secret which were generated as part of registering the application, you should be able to receive successful response as below.
- Sometimes there is service unavailable error 503 while triggering the application, in that case make sure during deployment you give runtime variables as :
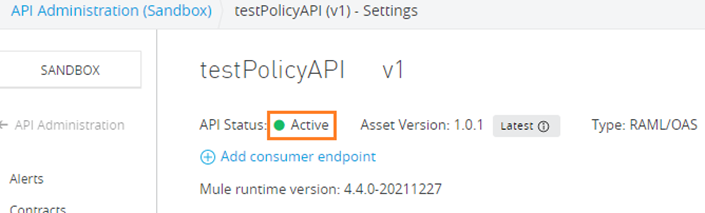
-M-Danypoint.platform.gatekeeper=disabled - Go to API Manager and manage the created API from exchange. The status of the API should be Active.
You should be successfully able to implement Client ID enforcement into your projects now.
Thank You!